Zoho CRM Vonage Extensions Configuration Guide


Welcome to the Vonage Extensions Configuration Guide. Follow these steps to successfully configure your Vonage extension for optimal performance with your CRM.
Step 1: Accessing the Settings Page
Method 1: Post-Installation Redirection
- After installing the Vonage extension, you will be automatically redirected to the Settings page.
Method 2: Manual Navigation
- Navigate to the Setting --> Marketplace --> All --> Installed Extensions of the CRM.
- Locate the settings under the Vonage Extension and click on it to open the configuration page.

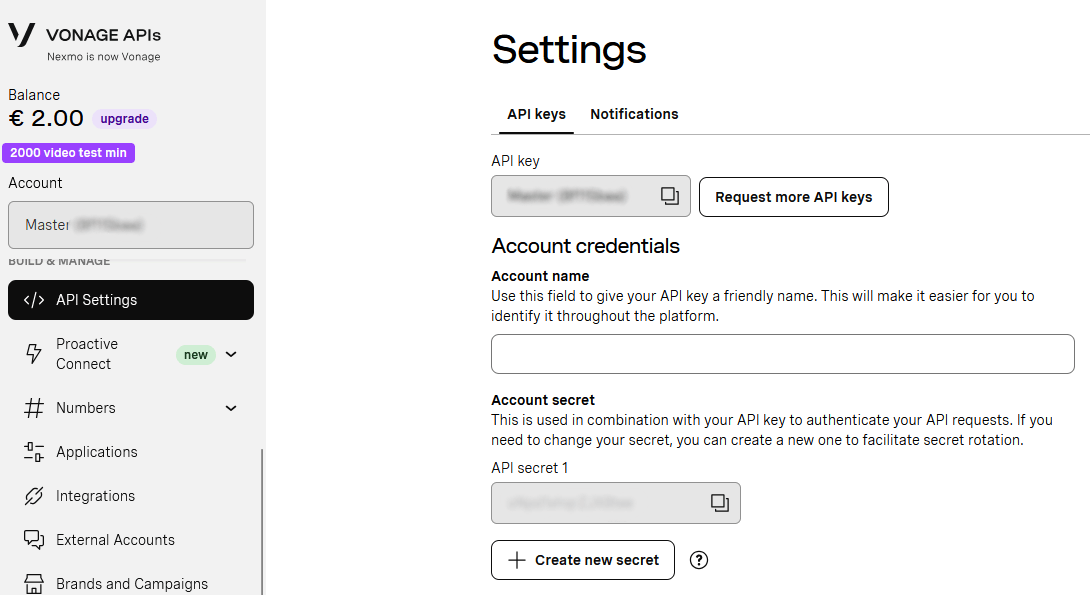
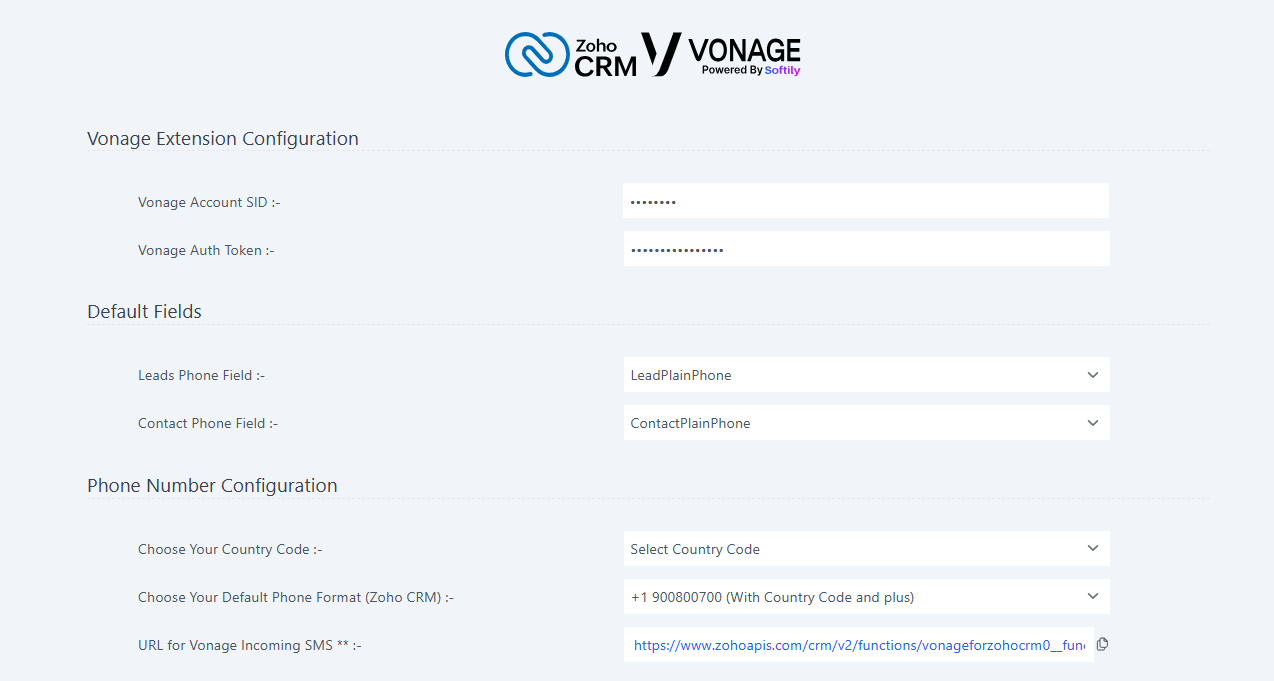
Step 2: Adding SID and Auth Token
-
On the Settings page, you will see fields labeled Vonage Account SID and Vonage Auth Token.
-
Enter your Vonage SID and Vonage Auth Token in the respective fields.
- Ensure that these credentials are correctly entered to enable proper communication between your CRM and Vonage services.

You can get the Vonage SID and Auth Token (API Secret) form in your Vonage Extensions API Settings Page.
Step 3: Selecting Default Phone Fields
- Below the API Key and Auth Token fields, locate the section for Default Phone Fields.
- Choose the default phone field for Leads from the dropdown menu.
- Similarly, choose the default phone field for Contacts.
- These fields will be used as the primary phone numbers for Vonage operations.

Step 4: Setting Default Country Code and Phone Format
- Find the section labeled
Choose Your Country CodeandChoose Your Default Phone Format (Zoho CRM). - Select Country Code from the dropdown menu. This will be used for all phone numbers in your CRM.
- Select your preferred Phone Format from the available options.
- This ensures that all phone numbers are formatted consistently according to your region's standards.

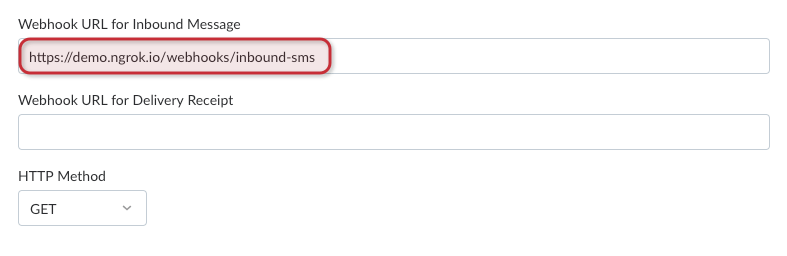
Step 5: Configure the webhook endpoint in your Vonage Dashboard
- Copy the
URL for Vonage Incomming SMS **and paste it into the field labelledWebhook URL for Inbound Messagein your Vonage Extensions API Settings Page.
Step 6: Finalize Configuration
- Review all the settings you have configured.
- You are now all set! Your Vonage extension is configured and ready to use with your CRM.
By following these steps, you will ensure that your Vonage extension is properly configured and integrated with your CRM, allowing you to leverage Vonage's powerful communication capabilities seamlessly.